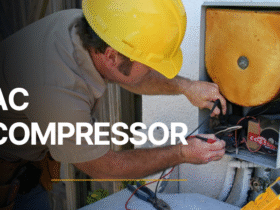
Replacing an AC compressor is not a quick fix. It’s a serious task that demands skill, the right tools, and proper safety precautions. If your compressor is faulty and beyond repair, changing it can restore the system and improve cooling performance.
How to Change AC Compressor?

This guide will walk you through the entire process with clear steps and important safety reminders. It is intended for HVAC professionals or trained technicians only.
Tools and Materials You Will Need
- Screwdrivers and socket set
- Refrigerant recovery machine
- New AC compressor
- New filter drier
- O-rings and oil
- Torch and brazing tools (for copper connections)
- Safety gloves and glasses
- Multimeter and pressure gauges
Step 1: Turn Off Power and Recover Refrigerant
Start by switching off the main power to the unit. This includes the breaker and any disconnect switch near the outdoor unit. Then, connect a recovery machine to the service ports and safely remove all refrigerant from the system. Make sure to follow environmental safety laws during recovery.
Step 2: Remove Old Compressor
Access the compressor by removing the service panel. Disconnect the electrical terminals. Next, disconnect the suction and discharge lines. Use your brazing torch if the lines are soldered. Once disconnected, unbolt the compressor from the base and take it out.
Step 3: Install New Compressor
Place the new compressor in position and secure it to the base. Connect the suction and discharge lines using new O-rings or proper brazing, depending on the unit design. Reconnect the wires according to the label or diagram on the unit.
Step 4: Replace the Filter Drier
Replace the filter drier every time you install a new compressor. The old one might hold moisture or debris. A new drier protects the compressor and ensures a clean system.
Step 5: Recharge the System
Connect your vacuum pump to the service ports and evacuate the system for at least 30 to 45 minutes. This removes air and moisture. Once the vacuum holds, recharge the system with the correct amount and type of refrigerant. Always follow the manufacturer’s specifications.
Step 6: Test it
Turn the power back on & set the thermostat to cooling mode. Check if the system starts up smoothly. Measure suction and discharge pressures using your gauges. Also, inspect for any strange noises or vibrations. Make sure there are no leaks.
If your AC compressor shut off after 2-3 minutes, it could indicate a faulty capacitor, overheating, or internal damage. In such cases, replacing the compressor is only one part of the solution.
Important Tips
- Never reuse refrigerant or skip the vacuum step.
- Use only compatible oil and refrigerant.
- Check that the airflow is normal and coils are clean.
- Always wear safety gear when handling refrigerant and electrical parts.
Summary
Knowing how to change an AC compressor properly can save your client from further breakdowns. It also extends the life of the system. Follow these steps closely and take time to verify all connections before restarting the unit.


Leave a Reply