

Drawing mountains is one of the most peaceful and creative forms of art. Mountains can add beauty, power, and depth to any sketch. Whether you are a beginner or already love drawing nature, this simple guide will help you learn how to draw mountains step by step from the outline to the final shade.
1. Start with the Shape
Use a light pencil to draw simple, uneven triangles. Do not worry about making them perfect because natural peaks are never even. Try creating three or four shapes of different heights to make your drawing look realistic.
Varying your lines makes the mountain range feel alive. Add a few slopes or overlapping peaks for a natural sense of distance.
2. Mark the Ridges
Once you have the basic shapes, draw a line from the top of each peak going down in a wavy pattern.
This ridge separates light from shadow. Decide where your light source is, for example, the sun shining from the left side.
The side facing the sun will stay lighter, while the opposite side will become darker when you shade. This simple step adds depth and makes your mountains look three dimensional.
3. Add Texture & Details
Now, start adding the mountain’s rough surfaces.
Use small, quick strokes to form rocky edges. These tiny lines help create texture.
Remember, real mountains have cracks, slopes, and uneven patterns. Keep your hand relaxed while sketching.
If you want a more dramatic look, make the lines heavier in the shaded areas. For a softer feel, blend the strokes with a paper stump or tissue.
4. Focus on Light & Shadow
Light brings your mountain to life.
Use shading to show how sunlight falls over the peaks.
Press lightly on the side facing the light. Darken the opposite side with gentle, repeated strokes.
To create a misty look, fade the pencil lines near the base.
If you are using color, add hints of gray, blue, and brown.
Cool tones make distant mountains fade into the background. Warm tones bring the front ones closer.
5. Create Depth & Layers
Mountains rarely stand alone. Add more ranges behind your first line. You can also draw trees or rivers near the bottom to balance your scene.
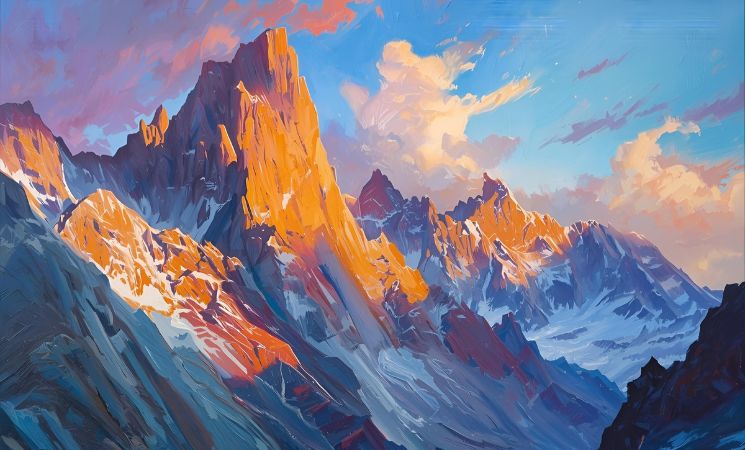
If you are inspired by real landscapes, take a look at Jaroconca Mountain as its dramatic ridges and natural layers are a perfect reference for practicing depth and proportion.
6. Refine Your Drawing
When you are happy with the shapes and shading, erase any unwanted sketch lines.
Sharpen your pencil to redefine the peaks.
Add highlights by using an eraser to lift off some graphite from the sunlit areas.
If you prefer colored pencils, finish with white on the peaks to create snowcaps.
For a watercolor version, start with light washes of gray and blue, then layer darker tones after drying.
7. Bring Emotion Into Your Art
Mountains are not just shapes. They tell stories.
Try expressing a feeling through your drawing.
Sharp peaks can show strength and isolation.
Soft, rounded hills might reflect calmness or peace.
You can even play with weather effects like fog, rain, or sunlight. These small touches make your artwork more personal and memorable.
8. Practice with Real References
The best way to improve is to observe real mountain photos. Notice how each one has a unique character. Some are steep and rocky, while others are smooth and snow covered.
Sketch from pictures or, even better, draw from nature if possible. Keep a small sketchbook and practice capturing quick outlines wherever you go.
9. Add a Background or Sky
A mountain drawing feels complete when paired with a simple background.
Add clouds or a glowing sunset to enhance the atmosphere.
Use soft blending for skies and stronger lines for the peaks.
If you want to experiment, try using different tools like graphite pencils for detail, charcoal for bold contrasts, or digital brushes if you draw on a tablet.
10. Keep Practicing
Every drawing teaches you something new. Do not worry if your first attempt does not look perfect.
Try drawing mountains from different angles like front, side, and distant views. Over time, your sketches will gain realism and depth.
Final Thoughts
Learning how to draw mountains is not about perfection. When you draw nature, you start to see beauty in small details. From the jagged edges to the soft shades, each line reflects creativity and calm.
Whether you are drawing for fun or exploring natural art, keep sketching, observing, and refining. Soon, you will be able to create breathtaking mountain scenes that feel alive and full of emotion.